Curious about “How To Thread A Sewing Machine”? You might be surprised to find it’s simpler than it looks! Threading your sewing machine is a key step to starting any sewing project, and with a bit of guidance, you’ll have it down in no time.
Here’s a straightforward, step-by-step guide to threading your machine:
- Spool Placement: Start by placing your thread spool on the spool pin at the top of the machine.
- Thread the Upper Path: Next, guide the thread through the machine’s upper thread path, including the thread guides, tension discs, and the take-up lever.
- Thread the Needle: Then, thread the machine’s needle, usually going from front to back.
- Wind the Bobbin: Place your bobbin on its winder and wind some thread onto it.
- Insert the Bobbin: Put the bobbin into its case, ensuring the thread unwinds correctly.
- Bring Up Bobbin Thread: Use the handwheel to raise and lower the needle, which will catch the bobbin thread. Gently pull the upper thread to bring the bobbin thread up.
- Close Bobbin Case: If there’s a cover, close the bobbin case securely.
And that’s it! With these steps, “How To Thread A Sewing Machine” becomes an easy, manageable task. Keep in mind, that every machine has its specifics, so it’s always a good idea to consult the manual for any unique details.
Threading a sewing machine might seem a bit daunting at first, but it’s an essential skill for anyone keen on sewing. Once you’ve mastered it, you’ll find it’s not only crucial but surprisingly straightforward. This detailed guide, focusing on “How To Thread A Sewing Machine,” is here to clarify the process. It’s crafted to help you thread your machine confidently and effortlessly, laying a solid foundation for all your sewing projects.
The Details of How To Thread A Sewing Machine
Let’s dive into this guide and transform the seemingly complex task of threading a sewing machine into a smooth and easy part of your sewing journey.
Understanding the Importance of Proper Threading
Ensures Even Stitches: The key to beautiful, professional-looking stitches lies in how well your machine is threaded. Incorrect threading often leads to uneven, skipped, or loose stitches, which can significantly compromise the quality of your work.
Reduces Machine Wear: Threading your machine correctly is not just about the end product; it also helps in reducing the wear and tear on your machine, ensuring it serves you well for a longer period.
Enhances Sewing Experience: A well-threaded machine operates smoothly, making your sewing experience more enjoyable and far less frustrating.
The Basics: Upper and Lower Threads
Upper Thread: This is the thread that comes from the spool, usually positioned at the top of your sewing machine. It’s visible on the top side of the fabric when you sew.
Lower Thread (Bobbin): This thread comes from a bobbin, which is placed underneath the needle area. It forms the stitches on the underside of your fabric.
Step-by-Step Threading Guide
Threading a sewing machine correctly is an essential skill for every sewing enthusiast. Whether you have a vertical or horizontal bobbin holder machine, the process can be easy once you understand the steps. Here’s a detailed guide on how to thread your sewing machine, using simple American English for clarity:
Step-1: Threading Vertical Bobbin Holder Machines
i) Spool Placement:
- Place the thread spool on the spool pin located at the top of your sewing machine.
- Make sure the spool is standing upright for smooth unwinding.
ii) Guiding the Upper Thread:
- First, lead the thread through the thread guide located at the top of the machine.
- Then, bring it down and thread it through the tension discs. These discs control the tension of the thread as it feeds through the machine.
- Finally, pass the thread through the tension spring. This helps maintain consistent tension while sewing.
iii) Needle Threading:
- Thread the needle from front to back, which is the standard direction for most sewing machines.
- If your machine has an automatic needle threader, you can use it for added convenience. It simplifies the process, especially for those with vision difficulties.
Step-2: Threading Horizontal Bobbin Holder Machines
The process is similar to that of vertical machines. However, the key difference is in how the thread unwinds. For horizontal machines, ensure the thread unwinds to the left.
Step-3: Threading the Lower Thread (Bobbin)
For Oscillating/Vertical Rotary Machines
Inserting the Bobbin:
- Place the bobbin into the bobbin case so that the thread unwinds in a clockwise direction.
Securing the Bobbin:
- Insert the bobbin case into the machine until it clicks into place. This ensures it is secured properly.
For Horizontal Rotary Machines
Inserting the Bobbin:
- Simply drop the bobbin into the bobbin holder, ensuring the thread unwinds counterclockwise.
Covering the Bobbin:
- Close the bobbin cover securely. This cover helps protect the bobbin and keeps the thread in place.
Step-4: Familiarizing Yourself with the Machine’s Layout
- Tension Disc: This component controls the tension of the upper thread, which is crucial for even stitching.
- Spool Pins: Here, you place the thread spool. Some machines have more than one spool pin for twin-needle sewing.
- Bobbin Winder: This is used to wind the thread onto the bobbin before it is placed in the machine.
- Handwheel: Located at the side of the machine, this manually controls the movement of the needle and take-up lever.
- Stitch Selector: Use this to choose different types of stitches, such as straight stitch, zigzag, or decorative stitches.
Step-5: Additional Tips for Success
- Thread Quality: Use the same type of thread for both the upper and lower threads. This helps ensure consistent stitching and tension.
- Cleanliness: Regularly clean your machine, particularly the bobbin area, to prevent lint build-up which can affect threading and the quality of your stitches.
- Bobbin Types: Use metal bobbins for older machine models and plastic bobbins for newer models. The right type of bobbin ensures smooth operation of your machine.
Step-6: The Final Steps
Raising the Lower Thread: Turn the handwheel towards you to bring the lower thread up to the surface of the needle plate.
Positioning Threads: Lay both the upper and lower threads under the presser foot, extending them towards the back of the machine. This prevents the threads from tangling when you begin sewing.
By following these detailed steps, you can thread your sewing machine efficiently and correctly, leading to a smoother sewing experience. Remember, practice makes perfect. The more you thread your machine, the more intuitive it becomes. Keep your machine’s manual close by for specific instructions and troubleshooting.
Read More: How To Thread…

Hey there, fellow sewing enthusiasts! Are you ready to dive into the world of sewing but feeling a bit overwhelmed by the thought of threading…

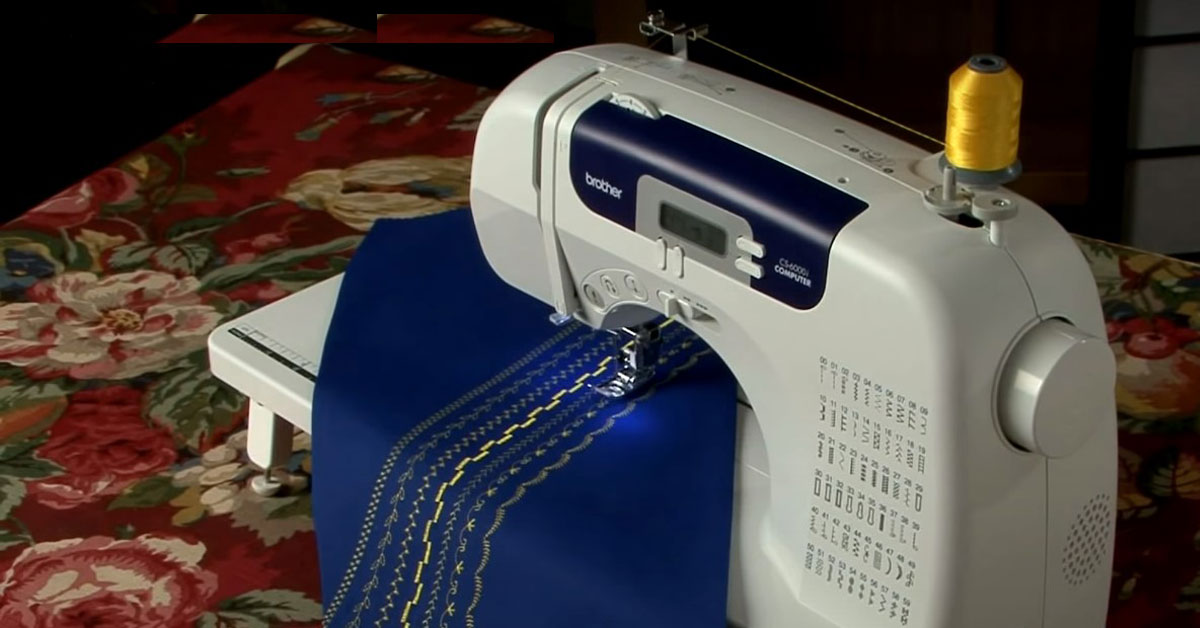
Threading a sewing machine is a fundamental skill that every sewing enthusiast should master, and the Brother CS6000i is a popular choice known for its…

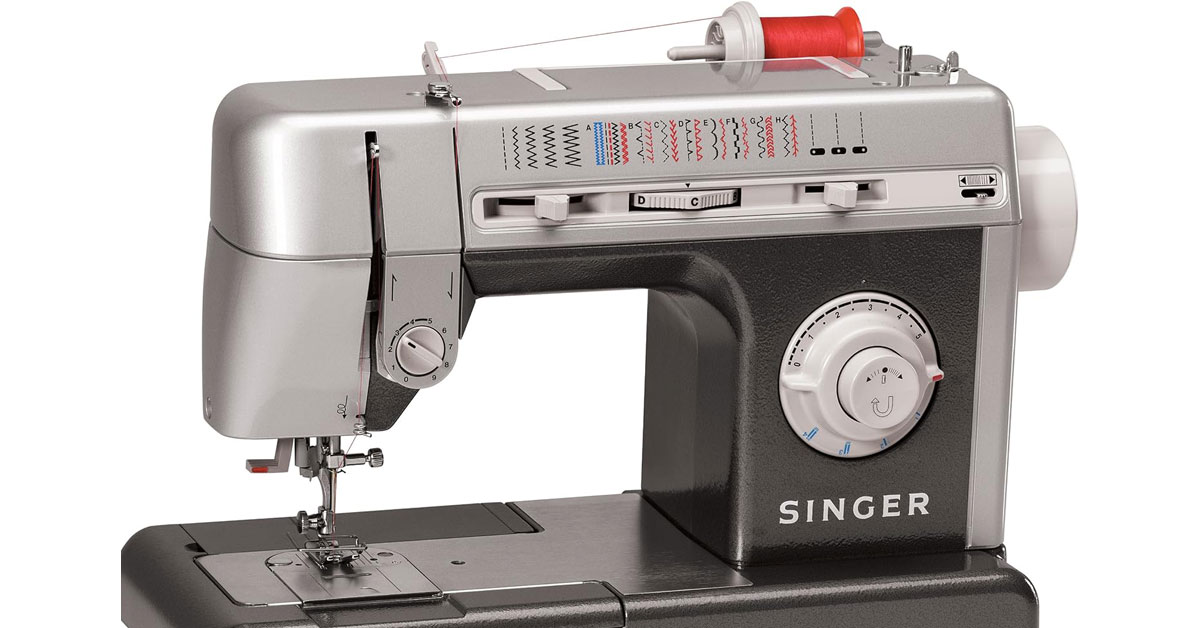
Threading Your Singer Simple Sewing Machine: A Detailed Guide… Ever noticed how some fabrics have perfectly even stitches that look professionally done? That’s not just…

Master the Art of Threading Any Singer Sewing Machine: A Step-by-Step Guide… Begin your sewing journey with the confidence of a well-threaded machine. Knowing how…
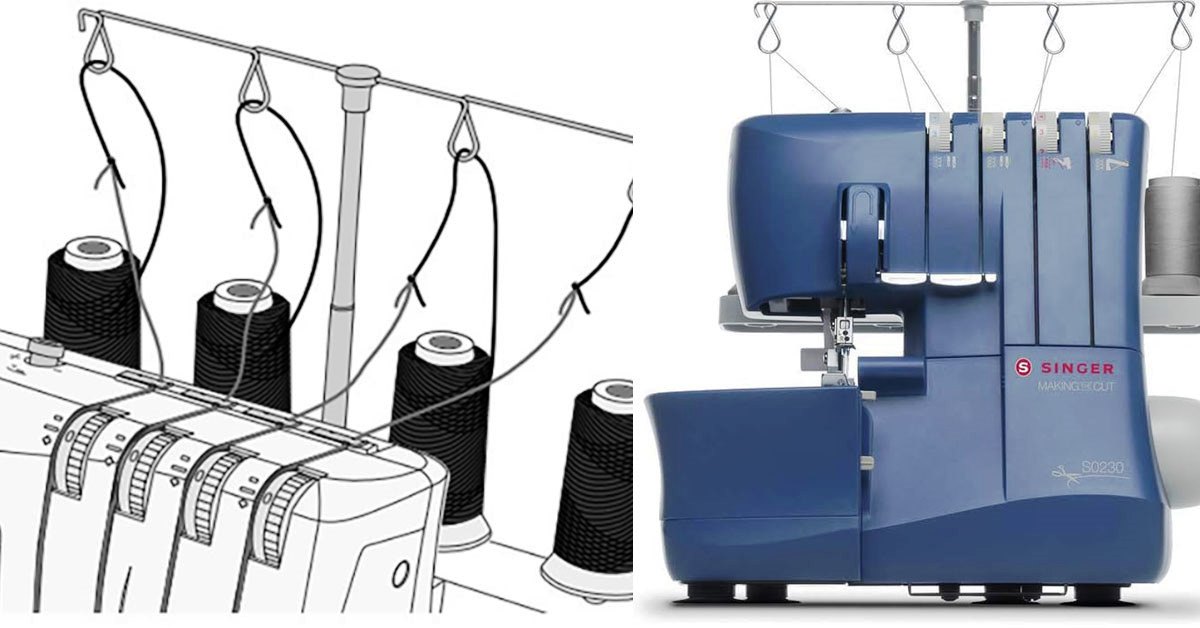
“Did you know that the secret to those beautifully finished edges on your favorite store-bought clothes lies in a serger? If you’ve been eyeing the…
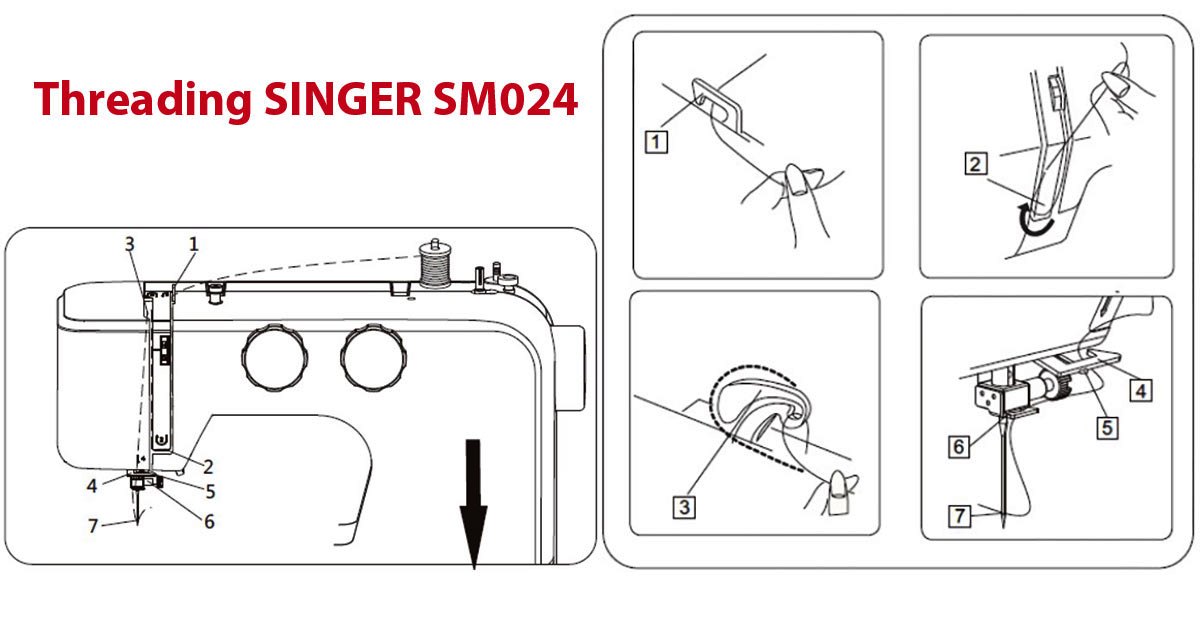
Welcome to the exciting world of sewing with the SINGER SM024! This machine is a fantastic choice for anyone who’s starting in sewing, as well…

Welcome to the intricate world of sewing where every stitch counts, and the success of your creative endeavors often hinges on the mastery of your…
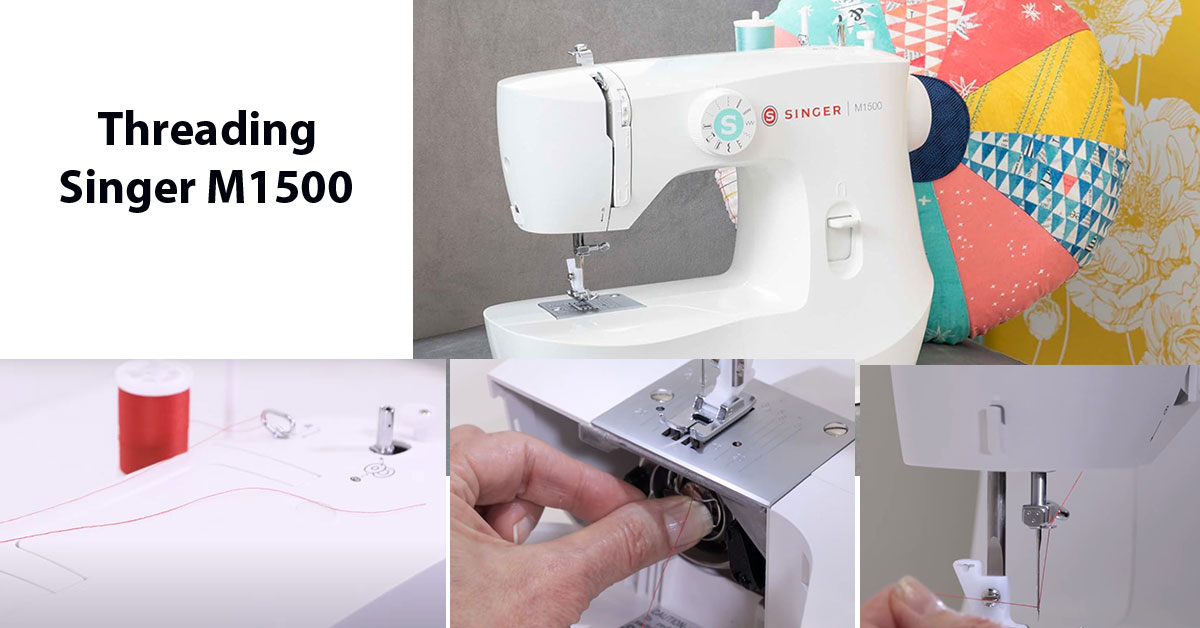
The Singer M1500 sewing machine stands as a testament to simplicity and efficiency in the world of sewing. Tailored for both beginners and seasoned sewists,…

Welcome to the world of sewing with the Singer 8280, a machine celebrated for its ease of use and precision, making it a top pick…
From the vintage rooms of old seamstresses to the modern crafting corners of today, Singer sewing machines have been an emblem of quality and precision.…
Have you ever been eager to start a new sewing project, only to be halted by the intimidating task of threading your computerized sewing machine?…
Greetings and Introduction to Topic… Have you ever found yourself nestled in a cozy crafting nook, swatches of vibrant fabrics cascading around, only to be…
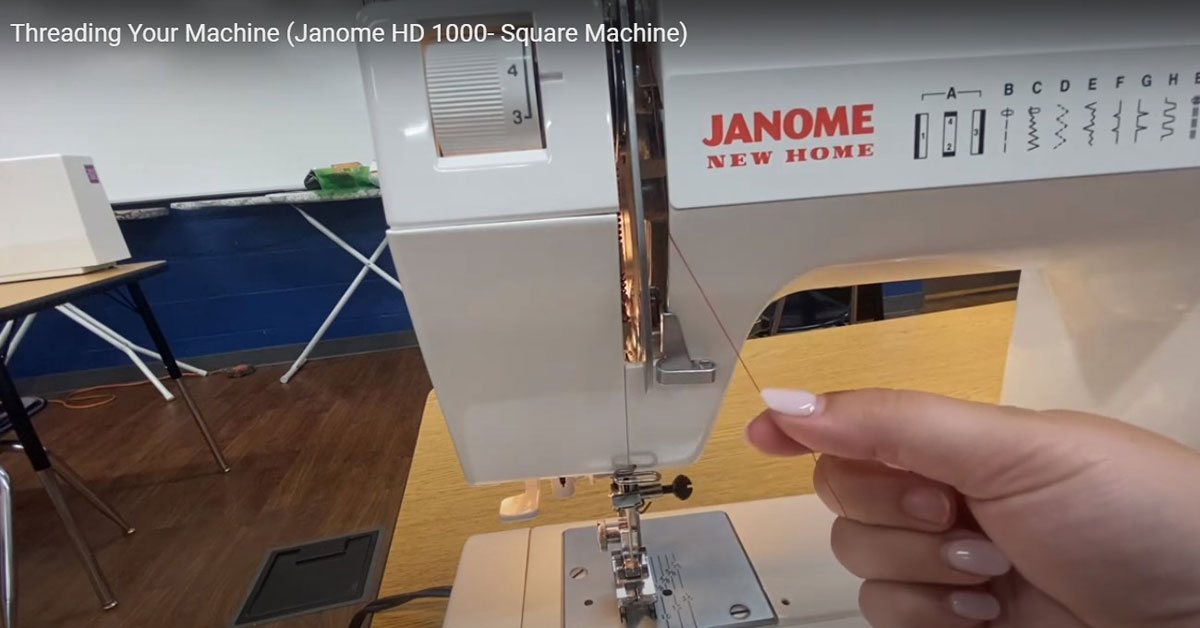
Embarking on a sewing journey with a Janome machine is a delightful experience, but even the most seasoned sewing enthusiasts sometimes get puzzled by the…
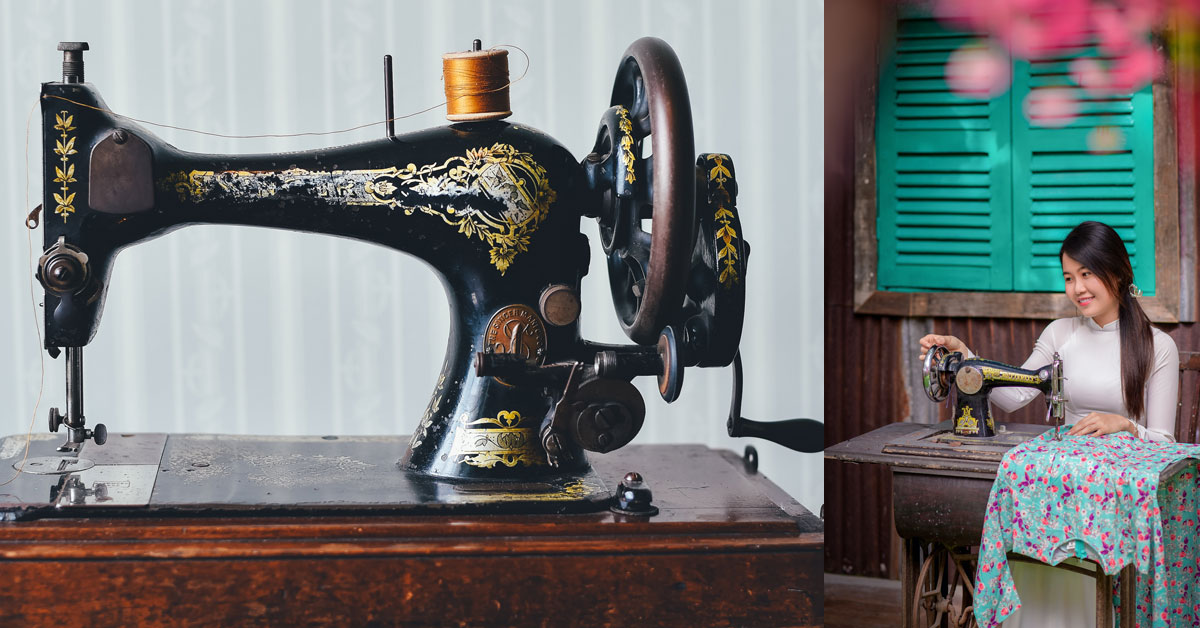
Have you picked up an old Singer sewing machine and want to know how to use it? We offer you a guide to take full advantage of this vintage…