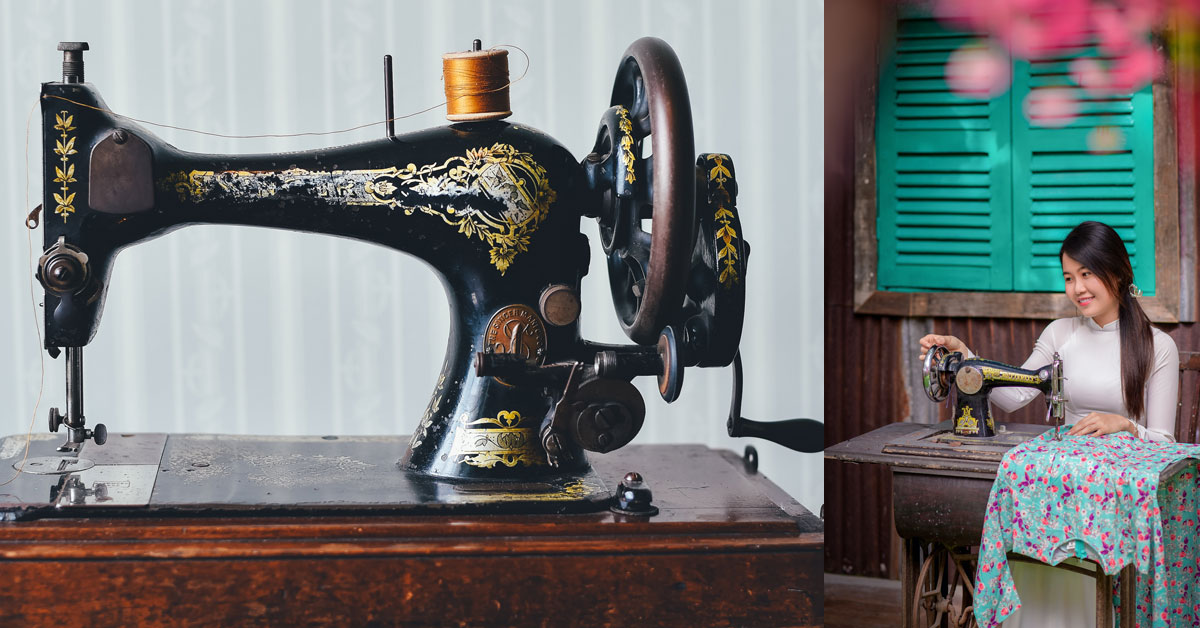
Have you picked up an old Singer sewing machine and want to know how to use it?
We offer you a guide to take full advantage of this vintage machine. You may have been seduced by its design in the first place, but if it is in working order you will also enjoy the quality of a Singer machine.
It would be a shame to deprive you of it. Especially since if you have used a sewing machine before, you will quickly find your bearings, even if many years have passed under the bridge since then.
Threading an old singer sewing machine
Before you can use your old Singer sewing machine, you need to thread it. For this, you need to install the upper thread and the lower thread. This is an important step that must be done carefully.
If you don’t have the user manual, you can look on the Internet or find a tutorial on YouTube to see how to do it. Even if the demonstration is not made on exactly the same sewing machine as yours, threading is essentially the same from one machine to another.
Here is an example you can follow:
Lower Threading
First, you need to fill your bobbin with the desired thread. Then you have to put the bobbin in the bobbin case. Be sure to place it in the right direction, so that the thread unwinds without difficulty, and to pass the thread correctly through the guide. The bobbin placement direction may vary from machine to machine.
Then install the bobbin case in the location provided for this purpose, by pulling on the small stem of the case. It must be locked in place so that it does not fall and pass into the lower part of the sewing machine. Generally, a small metal hatch provides access to this part of the machine. Just slide it open and close it.
Upper Threading
It is then time to move on to threading the upper thread. To do this, place your spool of thread in the spool pin on top of your sewing machine. Then, follow the guides one by one without missing any. Incorrect threading will cause problems when you go to sew, or even prevent the machine from working. That’s why it’s important to do it carefully.
In the event of any problem, if your thread breaks, if loops appear, etc., the first thing to check on your machine is that the threading is correct. Once the thread has passed through the guides, thread it through the needle from left to right. Then hold this thread that you have just passed in one hand and, with the other hand, operate the steering wheel. This will bring up your bobbin thread. You can then test your stitch on a scrap of fabric.
Adjust your old sewing machine
Like newer sewing machines, your old Singer sewing machine has settings. They are more or less numerous depending on the model.
In any case, you will find a wheel to adjust the tension of your thread. If your top thread is so tight that it shows your bobbin thread on the right side of your work, the tension is too much. You must loosen the knob in order to release the two discs which slow the thread flow. Conversely, if your needle thread is too loose on your work, you should tighten the dial to increase thread tension.
The objective is to obtain a point where the bobbin thread does not appear on the right side, nor does the needle thread appear on the wrong side. Your point is then correctly formed. You can also choose a longer or shorter stitch. Stitch length will vary from fabric to fabric.
The thinner the fabric, the smaller the stitch will be, resulting in a strong seam. For a thick fabric, we would rather use a larger point. Be careful, however, not to opt for a stitch that is too small, because then your machine will no longer feed the fabric. In the case of a stitch that is too large, the risk is that the seam may not hold.
Related: How to thread a sewing machine (step-by-step)
Whether it’s exactly this model or another brand (the ones I’ve seen threaded practically the same), it’s very easy.
I have prepared step-by-step photos.

First thing, place the spool of thread. I don’t know if there is a difference, but I put it as in the photo so that the thread goes from the front to the right.
From the spool, the thread goes to this piece.

Through the tension discs (the tension is regulated by tightening or loosening that thread).

Turning around (below) the tension discs, we then pass over this piece.

Through this hole (it’s open on one side, just thread the thread through and push).

Inside this hole (from behind to front).

Through this hole (it’s open on one side, just thread the thread through and push).

Down through this piece (as you can see, it’s open on one side, so it’s very easy to get through).

To finish with the thread, we thread the needle, passing the thread from left to right. It’s funny because the needle hole is the other way around than in modern machines (or at least the other way around the ones I’ve used).

Leave this thread long enough, or it will unravel when you start sewing.

Let’s go for the shin. You can remove the lid by sliding it, but to put your hand in it is better from below.

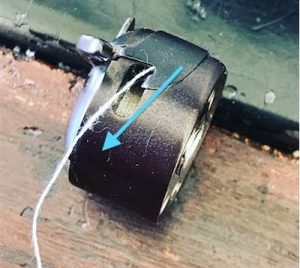
The bobbins that the machine uses are of these metallic ones. Don’t worry if you don’t have them or they are very old because they still sell them.

To remove the bobbin, simply pull as I show you in the photo

We put the bobbin in the bobbin case, with the thread in the direction that I show you:

We pass the thread through the slot…
until it comes out there (it makes a little ‘click’).

To replace the shin guard, we put our hand under it and simply aligned as indicated by the arrow and pushed gently.

As always, the last step is to remove the thread from the bobbin. It is done as in modern machines: you lower the needle – holding the thread – you raise it again, and you pull the end of the upper thread so that the lower one appears. You stretch it and you can sew 🙂
As always, the last step is to remove the thread from the bobbin. It is done as in modern machines: you lower the needle – holding the thread – you raise it again, and you pull the end of the upper thread so that the lower one appears. You stretch it and you can sew 🙂
Tip: Controlling the speed of the pedal is not difficult, but at the beginning, it is difficult to know if you start in the right direction or not. Try to start by moving the wheel by hand, and from there you hit the pedal.
And how do we fill the tap? I tell you in this post.
If you want to adjust the length of the stitch, it is with the ‘knob’ that I mark you in this photo. You have to loosen it by unscrewing it a little, raise or lower depending on how you want it, and tighten it again by screwing.
Switch to sewing
Voila, you can now sew with your old machine, just as you would with a newer one.
Place your fabric under the presser foot and lower it so that it maintains the layers of fabric, as with any other sewing machine. Hold both of your wires back when starting. If you have a handwheel, you can activate it to start your work gently and start the movement of the foot pedal.
Some do not have a steering wheel, only a rheostat pedal, in this case, start carefully, as it may not have a speed modulator and, therefore, start very quickly. The stopping point can be achieved with a lever that is put in a high position to go backward, and then in a low position to go forward.
A little advice: always start with scraps of fabric to get your hands on your machine.
Read More if needful: Threading an old Singer sewing machine is an invaluable skill, allowing you to embark on various sewing projects with ease. As you hone this skill, it’s advantageous to learn about other machines as well. Check out our detailed guide on how to thread a Janome sewing machine to expand your expertise and versatility in handling different sewing machines.”
In Final Words
With this entry, we will explain how an old sewing machine is threaded. All sewing machines are similar when it comes to threading the upper thread, it changes the layout and design of the thread guides, the tension disc…etc.
With older sewing machines, as it’s not from our generation, if it’s your first time threading one, you may encounter some difficulty when threading it, with the outer tension disc differing from today’s sewing machine.
To explain in summary, how to thread an old Singer sewing machine: To start, place the spool on the stick above your machine. Direct your thread towards the thread guide which is on your left. Lower the thread passing over the two discs. Then, bring it up by making sure that it passes behind the small hook.
Go up in the tensioner, then go back down through the two lower thread guides. Insert the thread into the needle hole from the front to the back. Raise the machine foot and pass the thread to the back. Then place the bobbin in its location. Route the thread counterclockwise.
Join the top and bottom thread together, turn the hand wheel towards you, and you will see that the bobbin thread will appear through the small hole at the bottom of the machine’s foot. Your machine will be ready to go.
How to thread a modern machine? To start, place the spool of thread above the machine. Direct the thread towards the thread guide on the left to go down following the small slot. Then go up, following the arrow. Go through the tensioner before going down again towards the lower thread guide. Introduce the thread into the needle hole always from the front to the back.
As regards the bobbin, the method is identical to that of the old machine. You will find instructions on the track as well as arrows on your modern machine. In this way, you can’t go wrong. Now you know how to thread an old and modern machine. Up to you!
Photo source: amazon.com and google