Did you know that the first Singer sewing machine could sew 900 stitches per minute, a marvel in its time?
Today, Singer continues to enchant with machines that embody both tradition and innovation. Imagine the stories a single thread could tell as it weaves through the fabric, creating everything from a simple pillowcase to an elaborate evening gown.
This guide is your thread, leading you through the rich tapestry of possibilities with every Singer machine. Whether you’re learning how to use a Singer sewing machine for beginners, mastering the compact power of a Singer handheld sewing machine, or commanding the robust force of a Singer heavy-duty machine, you’re not just sewing; you’re becoming a part of a story that began over a century ago.
We’ll cover everything from the basics of a Singer Simple sewing machine to the advanced features of a Singer Talent sewing machine. Discover the ease of a handheld Singer sewing machine for quick fixes, the versatility of using a double needle on a Singer sewing machine for decorative flair, or the classic charm of an old Singer sewing machine.
Whether you’re starting your sewing journey with a Singer Start sewing machine or exploring the creative potential of twin-needle sewing on a Singer, your journey through the realms of fabric and thread starts here. Let’s turn the page and stitch your chapter into the ever-growing Singer saga.
How to Use a Singer Sewing Machine: A Step-by-Step Guide
Setting Up Your Singer Sewing Machine: A Step-by-Step Guide
Step 1: Finding the Perfect Spot
Choosing an ideal workspace is the first critical step in your sewing journey. Look for a stable, flat surface where your Singer sewing machine can sit securely without any wobbling or shifting.
Good lighting is essential for precise sewing, so select a spot with plenty of natural light or supplement with a bright lamp. Ensure your chosen area is free from distractions and spacious enough to comfortably accommodate your materials and patterns.
Additionally, consider the proximity to power outlets for easy machine access and think about where you’ll store the machine when it’s not in use.

Step 2: Power and Positioning
After selecting the perfect spot, it’s time to position your Singer sewing machine properly. Place it on a sturdy table or desk to minimize vibrations and ensure stable operation.
Check the power cord for any damage and then plug it into a surge protector; this step is crucial for protecting your machine from potential electrical surges.
Position the sewing machine so that the foot pedal and controls are within comfortable reach, ensuring an ergonomic setup that will prevent strain during long sewing sessions.
Step 3: Winding the Bobbin
Before you dive into sewing, you need to wind the bobbin with thread. Begin by placing your thread spool onto the spool pin. Then, guide the thread along the machine’s specific path leading to the bobbin winder.
Engage the bobbin winder by pushing it to the side or following your model’s unique instructions. Gently press the foot pedal to start the winding process, watching as the bobbin fills evenly. Once the bobbin is sufficiently full without being overfilled, stop winding.
If you encounter any problems such as uneven winding or thread breakage, consult your machine’s manual for model-specific troubleshooting advice.

Step 4: Threading the Machine
Correctly threading your machine is vital for successful sewing. While threading paths may vary slightly between Singer models, the general process involves placing the thread spool on the spool pin and following the numbered guide marked on your machine.
This guide will lead you through various hooks, tension discs, and finally to the needle. If your Singer machine is equipped with an automatic needle threader, use this handy feature to make the task easier.

If you’re new to sewing or unfamiliar with your specific model, don’t hesitate to refer to the illustrated instructions in your manual or seek online video tutorials for additional guidance. you can learn more about How to Thread a Singer Sewing Machine.
Embarking on Your Sewing Adventure
With your Singer sewing machine correctly set up, you’re now ready to embark on a wide array of sewing projects. These foundational steps are not merely preparation; they’re your introduction to a world of creative expression and skill-building.
Whether you’re tackling a simple repair or a complex garment, your Singer sewing machine is a trusted companion, ready to turn your creative visions into tangible realities.
As you grow more comfortable and experienced with your machine, you’ll find that each stitch is not just a piece of thread but a part of your ongoing sewing story.
Basic Stitching Techniques
Understanding Stitches
Singer sewing machines offer a variety of stitches for different purposes. The most common is the straight stitch, used for basic seams and topstitching. The zigzag stitch is versatile, perfect for stretch fabrics, buttonholes, and appliqué.
Decorative stitches can add a creative touch to any project, while stretch stitches are designed for fabrics that need extra give. Understanding the purpose of each stitch will help you choose the right one for your project.
Selecting a Stitch
On most Singer models, stitch selection is made easy through a dial or a digital interface. For dial models, turn the dial until the desired stitch number or symbol lines up with the indicator. On digital models, you might press buttons or touch a screen to select stitches.
Each stitch might also allow for adjustments in width and length, customizable for your specific project needs. Always refer to your manual for model-specific instructions.
Thread Tension
Thread tension controls how tightly the thread is pulled through the fabric, which affects the stitch quality. If the tension is too tight, the fabric may pucker. If too loose, the stitches might be uneven or have loops.
Most Singer machines have a tension dial, typically numbered from 0 to 9. Start with a mid-range setting (around 4 or 5) and adjust based on a test seam on scrap fabric. Thicker fabrics or heavier threads might require higher tension, while delicate fabrics need lower tension.
The Quick Stitching Process
- Preparing to Sew: Place the fabric under the presser foot, lower the needle into the starting position, and lower the presser foot to secure the fabric.
- Starting to Sew: Begin with a few backstitches to secure the thread, then gently guide the fabric, letting the machine feed it through without pulling.
- Managing the Sewing: Keep an even pace and guide the fabric to ensure straight seams. Use your machine’s markings as a guide for seam allowances.
- Finishing Stitches: End with a few backstitches to secure the seam, then raise the needle and presser the foot to remove the fabric. Trim the threads close to the fabric.
Using a Singer Handheld Sewing Machine
Introduction to Handheld Models
Handheld sewing machines are compact and portable, perfect for quick repairs and small projects. They’re not as robust or versatile as full-sized machines but can be handy for travel or minor mending. Understanding their capabilities and limitations will help you get the best results.
Installing Batteries and Powering Up
Most handheld models are battery-operated. Ensure you’re using the recommended battery type and installing them correctly according to the device’s instructions. Check the power switch and test the machine briefly before starting your project to ensure it’s working correctly.
Threading the Handheld Machine
Threading a handheld machine is generally straightforward but can vary by model. Typically, you’ll pass the thread through a guide, then through the tension control, and finally thread the needle. Some models might have a small lever or tool to help with threading the needle. Always ensure the thread is flowing smoothly without knots or tangles.
Stitching with a Handheld Machine
- Securing the Fabric: Start by holding your fabric taut with one hand while you operate the machine with the other. Ensure the fabric is smooth and flat.
- Starting to Stitch: Press the power switch and gently guide the machine along your desired seam line. Don’t pull the fabric; let the machine feed it through.
- Finishing the Seam: Once you’ve reached the end of your seam, secure the thread by tying off the end or using a small amount of clear nail polish to prevent unraveling.
Using a Singer sewing machine, whether it’s a full-sized or handheld model, opens up a world of creative possibilities. By understanding and mastering these basic techniques, you’ll be well on your way to completing projects with confidence and skill.
Using a Singer Simple Sewing Machine
Introduction to the Singer Simple
The Singer Simple is designed for ease of use and reliability, making it ideal for beginners and those looking for straightforward sewing. It typically features a variety of basic stitches, easy stitch selection, and automatic settings for tension and stitch length, making it suitable for a range of projects from simple garments to home decor.
Setup and Selection
- Bobbin Winding: Place the thread on the spool pin, wind it around the bobbin winder tension disc, then onto the bobbin itself. Engage the bobbin winding mode and start the machine.
- Threading: Follow the numbered threading path printed on the machine. This will guide the thread through various hooks and levers, down to the needle. Use the automatic needle threader if available.
- Stitch Selection: Turn the dial to select your desired stitch. Reference the machine’s guide to understand what each stitch symbol means.
Basic Sewing with Singer Simple
- Preparing Your Fabric: Place the fabric under the presser foot, lower the needle at the starting point, and lower the presser foot.
- Starting to Sew: Use the handwheel to make the first few stitches, then gently press the foot pedal to continue. Guide the fabric smoothly through the machine.
- Finishing: Reinforce the end of your seam with a few backstitches, then raise the needle and foot to remove your fabric.
Read More: Threading a Singer Simple Sewing Machine
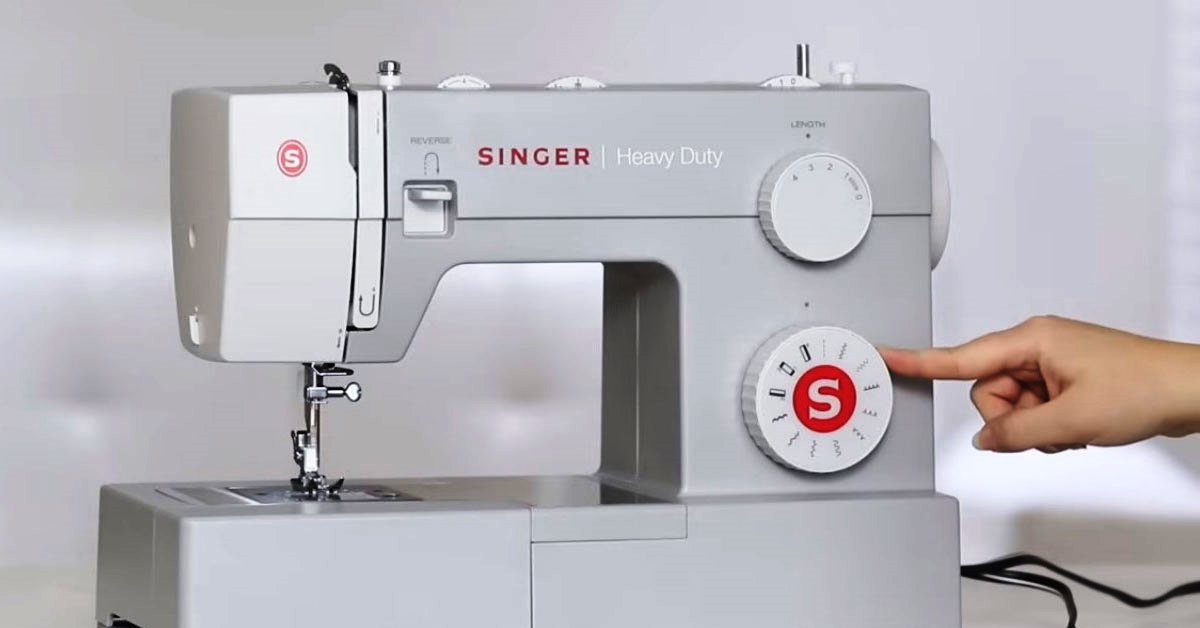
Using a Singer Heavy-Duty Sewing Machine
Why Heavy Duty
Singer Heavy Duty machines are built to handle more rigorous tasks. They can sew through multiple layers of fabric or thicker materials like denim and canvas with ease. Their powerful motors and faster sewing speeds make them suitable for projects requiring durability and precision.
Preparation and Setup
- Threading and Bobbin: Similar to other models but ensure the machine is well-oiled and clean, as heavy-duty sewing can produce more lint and debris.
- Settings: Adjust the presser foot pressure and tension settings to accommodate heavier fabrics.
Sewing with Power and Precision
- Controlling Speed: Start slow to maintain control, then gradually increase speed as needed.
- Handling Fabric: Use both hands to guide the fabric, ensuring it feeds evenly without pulling or stretching.
Mastering Specific Features on Various Singer Models
Double Needle Sewing
Using a double needle allows you to create parallel lines of stitching, adding a professional finish to hems and decorative touches. Install two spools of thread and thread each needle separately, adjusting tension as needed for even stitches.
Singer Talent
The Talent series boasts features like automatic needle threading, a variety of stitch patterns, and adjustable stitch length and width. Familiarize yourself with these features to fully utilize the machine’s capabilities.
Singer Tiny Tailor
This compact mending machine is great for quick fixes and small projects. Understand its limitations and best use cases to get the most out of this handy tool.
Vintage Singer Machines
Older Singer models often operate with a manual foot pedal or hand crank. Regular maintenance, including oiling and cleaning, is crucial. Learn the specific operations of your vintage model to keep it running smoothly.
Singer Start
The Start model is designed with beginners in mind, offering simple stitch selection and easy setup. Focus on mastering the basics with this user-friendly machine.
Twin Needle Sewing
Not all models support twin needles, so check your manual first. Twin needle sewing allows for decorative stitching and professional hems. Adjust settings for tension and stitch width to ensure even, beautiful stitches.
By understanding and utilizing the features specific to your Singer model, you’ll enhance your sewing skills and enjoy a more rewarding sewing experience. Whether you’re working on a simple craft with the Singer Simple or tackling a heavy-duty project, your Singer sewing machine is a valuable tool that, with care and understanding, will serve you for many years.