Keeping Your Singer Sewing Machine in Top Shape: The Ultimate Guide to Changing Needles…
Are you aiming to keep your Singer sewing machine humming beautifully? Well, Regularly changing the needle is a straightforward yet crucial step to ensure it performs optimally. A sharp, new needle can significantly enhance your sewing, resulting in clean, beautiful stitches, protecting your fabric, and maintaining your machine’s smooth operation.
Let’s explore the essential steps of how to change the needle on a Singer sewing machine and understand why this task is much more than just maintenance—it’s an upgrade for your sewing projects!
Understanding the Importance of a Sharp Needle
Changing the needle isn’t just about avoiding the inconvenience of broken or bent needles. Dull or damaged needles can lead to a plethora of issues – skipped stitches that disrupt your pattern, fabric snags that ruin your material, and potential damage to your machine.
By replacing old needles, you’re not only keeping your machine content; you’re ensuring every project looks neat and professional.
When to Change Your Sewing Machine Needle
You should ideally change your needle after completing every project or after approximately 8 hours of continuous sewing. However, this is a flexible guideline.
If you accidentally sew over a pin, hear an unusual noise, or notice imperfect stitches or fabric pulls, interpret these as signals from your machine that it’s time for a new needle.
Choosing the Right Needle for Your Project
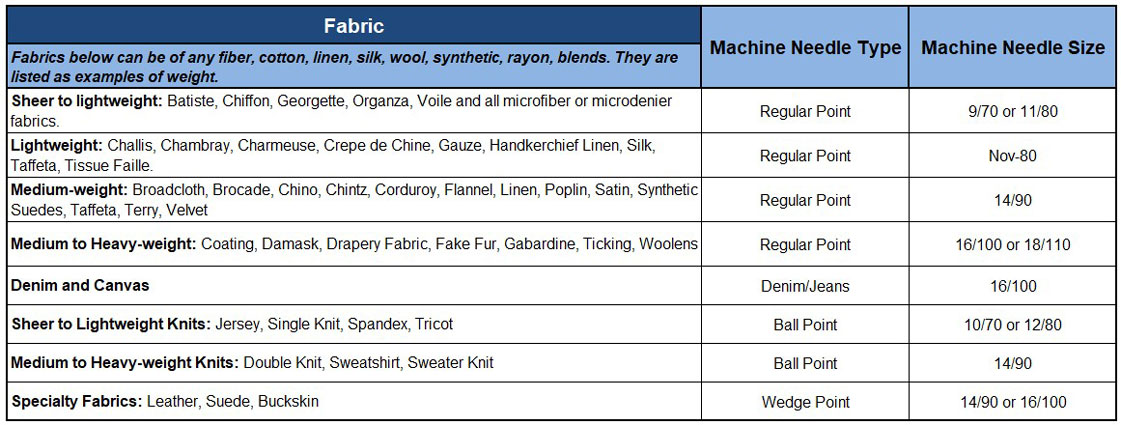
Not all needles are created equal, and your Singer sewing machine is compatible with various types. The appropriate needle depends on the fabric and thread you’re using. Here’s a brief guide:

- Universal Needles: The versatile choice suitable for most woven fabrics and some knits. When in doubt, a universal needle is a safe option.
- Ballpoint Needles: These needles are essential for knit fabrics. They part the fibers gently instead of piercing them, preventing annoying snags and runs in your stretchy materials.
- Specialty Needles: These needles are for specific tasks like intricate embroidery, tough leather, and more. If you’re working on something unique, consider a needle designed for that purpose.
The numbers like 70/10 or 90/14 represent the needle’s thickness. A larger number means a thicker needle. Match the needle size to your fabric’s weight – thinner needles for lighter fabrics and thicker ones for heavier materials.
Easy 5 Steps Guide: How to Change Needle on Singer Sewing Machine
Here’s a more detailed guide with examples for changing the needle on both old and new model Singer sewing machines.
Step 1: Access the Needle Area
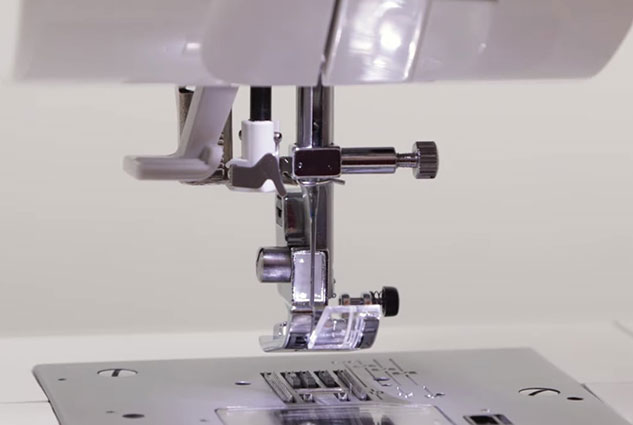
Raise the Needle: Older model, Turn the handwheel towards you to move the needle to its highest position. On newer models, you might have a ‘needle up/down’ button for ease. For example, on a Singer Quantum Stylist 9960, you can press the needle up/down button to quickly raise the needle.
Lift the Presser Foot: This increases your workspace and reduces the risk of accidentally snagging the fabric. On an older model like the Singer 201, you lift the presser foot by pulling up on the lever located at the back of the machine.
Step 2: Remove the Old Needle

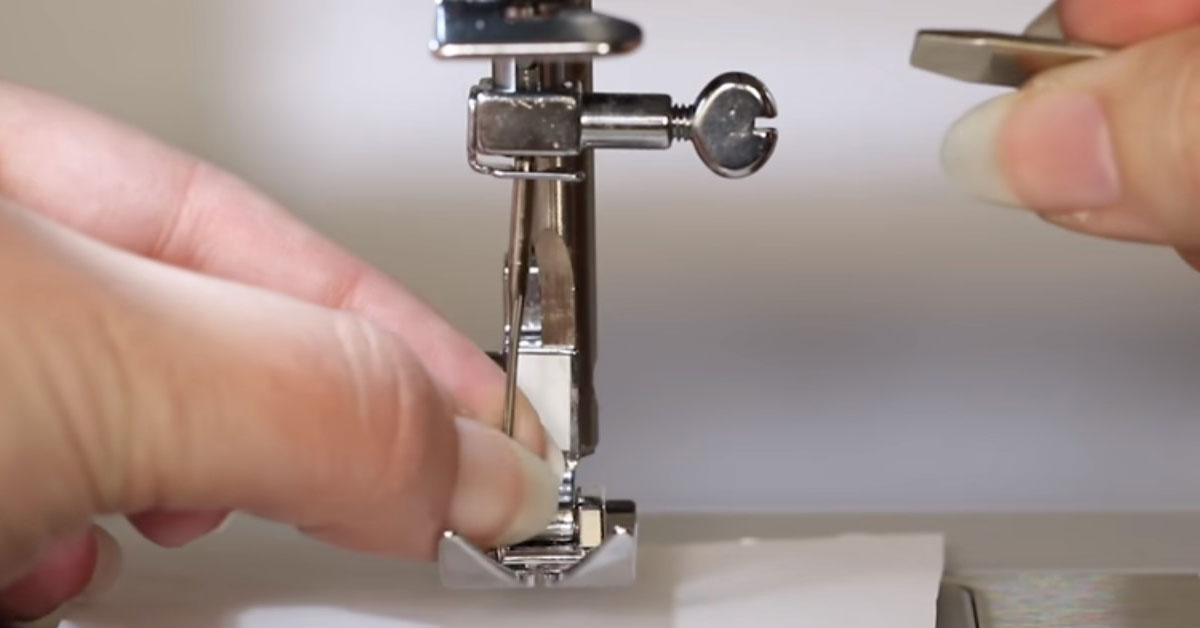
Loosen the Clamp Screw: Find the small screw on the needle clamp and gently turn it counterclockwise. You may need a small screwdriver for this, but some machines, such as the Singer Simple 3223, allow you to do this with your fingers.
Withdraw the Needle: Once the screw is loose, carefully pull the needle down and out of the clamp. Dispose of the old needle safely, perhaps in an old pill bottle or a designated sharps container.
Step 3: Inserting the New Needle
Prepare the New Needle: Ensure it’s the correct type and size for your fabric. For instance, if you’re working with a knit fabric, choose a ballpoint needle sized 70/10 for light knits or 90/14 for heavier ones.
Position Correctly: Hold the needle with the flat side facing toward the back of the machine and slide it up into the clamp until it can’t go any further. For example, when inserting a needle into a Singer Heavy Duty 4423, make sure the flat side faces the rear of the machine and it’s pushed up as far as possible.
Step 4: Securing the Needle

Tighten the Clamp Screw: Use your screwdriver to turn the clamp screw clockwise until tight. Ensure the needle is straight as you tighten but avoid over-tightening to prevent damage. For example, in a Singer Tradition 2277, you’d use the small screwdriver included with the machine to tighten the screw securely.
Step 5: Final Checks and Testing
Check the Needle Position: Ensure the needle is straight and fully inserted. In older models like the Singer 66, you might have to ensure the needle’s eye is facing forward.
Test on Scrap Fabric: Re-thread your machine with the top thread and bobbin, then test a few stitches on a scrap piece of fabric to ensure everything is functioning correctly. For example, if you’re using a Singer Confidence 7640, you’d select a simple straight stitch and observe the stitch quality on a fabric scrap similar to your project material.
By following these detailed steps, whether you have an old trusty Singer or a new, feature-rich model, you’ll ensure a successful needle change. This leads to smoother sewing and more beautiful results in all your projects. Regularly changing your needle is a simple yet impactful way to maintain your machine’s performance and ensure the quality of your sewing projects.
Read more, Here’s a more detailed exploration of adjusting the needle position, troubleshooting common issues, and maintaining your Singer sewing machine for optimal performance.
Adjusting the Needle Position
Why Adjust the Needle Position? Adjusting the needle position can enhance your sewing precision, especially for tasks like edge stitching, zipper installation, or creating specific seam allowances. It allows for better fabric alignment and can improve the overall finish of your sewing project.
How to Adjust:
- Locate the Control: Find the dial, lever, or button that controls the needle position. On many Singer machines, this will be a dial on the front panel or a button with directional arrows.
- Understand the Settings: Most machines offer three positions – left, center, and right. The center position is standard for most sewing tasks, but moving the needle to the left or right can help with specialized stitches or when sewing close to zippers or bulky seams.
- Make the Adjustment: Turn the dial or press the button to move the needle to the desired position. For instance, on the Singer Quantum Stylist 9960, you’d use the stitch width dial to shift the needle left or right.
- Test the Adjustment: Always test the new needle position on a scrap of fabric similar to your project material. This ensures the needle won’t hit the presser foot or throat plate and confirms you’re achieving the desired effect.
Read More: How to Adjust Needle Position on Singer Sewing Machine
Troubleshooting Tips
Here’s a list of troubleshooting tips for common issues you might encounter with your Singer sewing machine:
Thread Breaking:
- Check the thread quality; use high-quality, smooth thread.
- Ensure the thread is correctly threaded through all guides and the tension is set properly.
- Inspect the needle for damage or dullness and replace it if necessary.
Skipped Stitches:
- Confirm the needle is fully inserted, correctly positioned, and the right type for your fabric.
- Re-thread the top thread and bobbin to ensure they are correctly in place.
- Check the sewing machine’s timing; if this is off, you may need professional servicing.
Fabric Not Feeding:
- Clean the feed dogs to remove lint and debris.
- Check the presser foot pressure and adjust if necessary.
- Ensure the stitch length is set correctly and not at zero.
Needle Breaking:
- Avoid pulling or pushing the fabric while sewing, which can cause the needle to bend and snap.
- Check that the needle type and size are appropriate for the fabric you’re sewing.
- Ensure the needle is correctly inserted and the screw is tightened adequately.
Bunching Thread Underneath Fabric:
- Re-thread the top thread, ensuring the presser foot is lifted during threading.
- Adjust the tension settings; it might be too tight or too loose.
- Check for a properly inserted and wound bobbin.
Machine Making Unusual Noises:
- Clean and oil your machine according to the manufacturer’s instructions.
- Check for loose parts or screws and tighten them.
- If the noise persists, consult a professional for a check-up.
Tension Issues:
- Use the machine’s tension adjustment to correct loose or tight stitches.
- Ensure you’re using compatible thread and needle types for your fabric.
- Clean the tension disks from dust and thread pieces.
Machine Won’t Start:
- Check if the machine is plugged in and the power switch is turned on.
- Ensure the foot pedal is properly connected.
- Check for any blown fuses or tripped circuit breakers in your home.
Uneven Stitches:
- Ensure the needle is straight and not bent.
- Check the timing of your sewing machine.
- Confirm the feed dogs are moving and set to the correct height.
Bobbin Issues:
- Ensure the bobbin is correctly inserted and threaded.
- Check the bobbin case for lint and clean it out.
- Verify that you’re using the correct bobbin type for your Singer model.
Remember, regularly maintaining your Singer sewing machine, like cleaning and oiling, can prevent many of these issues. If problems persist or you’re unsure how to fix an issue, consult your Singer sewing machine manual or contact a professional technician for assistance.
Maintaining Your Machine for Longevity
Regular Maintenance:
- Change Needles Regularly: A dull needle can damage fabric and affect stitch quality. Change your needle after every project or after about 8 hours of sewing.
- Clean Regularly: Lint and dust can accumulate over time, especially in the bobbin case and under the needle plate. Use a small brush to clean out these areas regularly.
- Oil as Needed: Check your manual to see if your machine requires oiling. If so, use only sewing machine oil and apply it to the specified parts.
Professional Servicing: Even with good home maintenance, it’s wise to have your machine professionally serviced every few years to ensure it’s in top working order.
Conclusion
Changing the needle on your Singer sewing machine and understanding how to adjust its position are essential skills for maintaining sewing quality and machine longevity.
By selecting the right needle, regularly maintaining your machine, and troubleshooting issues promptly, you’re setting the stage for endless successful sewing projects.
Before diving into your next creation, remember to give your machine and needle a quick check—your future sewing self will indeed be grateful!