Welcome, dear readers, to a world where creativity intertwines with practicality—sewing! An art and a necessity that has sewn itself into the fabric of our history, transcending mere stitches into a medium expressing creativity, sustainability, and resourcefulness. In this versatile craft, understanding your tool is paramount.
Today, we introduce you to the Singer 3337 Sewing Machine, an embodiment of tradition and modernity, designed to turn your dream projects into tangible reality. With a rich legacy of over 160 years, Singer has seamlessly woven itself into our homes and hearts, consistently ensuring that quality and innovation are stitched into every product.
As we unravel the threads of “How to Use Singer 3337 Sewing Machine“, immerse yourself in a journey where each page unfolds a pathway to master the art of seamless stitching, guiding you through every loop, twirl, and stretch of your imaginative threads.
Let’s sew the seeds of creativity and skill together with Singer 3337, crafting not just fabrics, but stories to be cherished forever!
Unboxing and Setting Up the Singer 3337
A. Unboxing
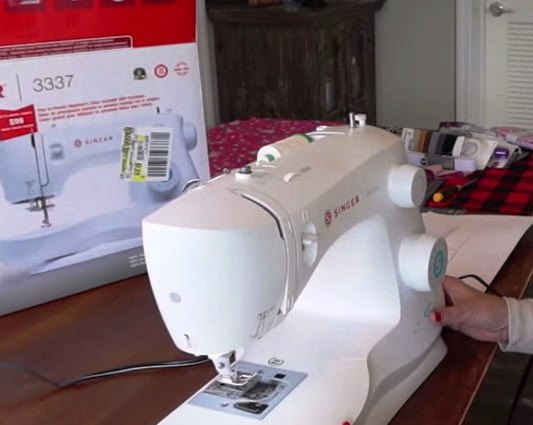
Your adventure in learning how to use the Singer 3337 sewing machine starts as soon as you open the box. Unwrapping the Singer 3337 sewing machine not only reveals a piece of equipment but also a gateway to the world of crafting and mending.
Securely nestled in the box, you’ll discover the stylish and sturdy Singer 3337, along with a wealth of accessories that underline Singer’s commitment to providing a comprehensive sewing experience. In your package, you’ll find indispensable items like an all-purpose foot, zipper foot, button sewing foot, buttonhole foot, and darning plate.
Furthermore, there’s a supply of needles, bobbins, a thread spool cap, and other essential accessories that signal the start of your sewing adventures. The detailed instruction manual, along with an accessory guide, welcomes you to explore, understand, and become well-acquainted with your new creative partner.
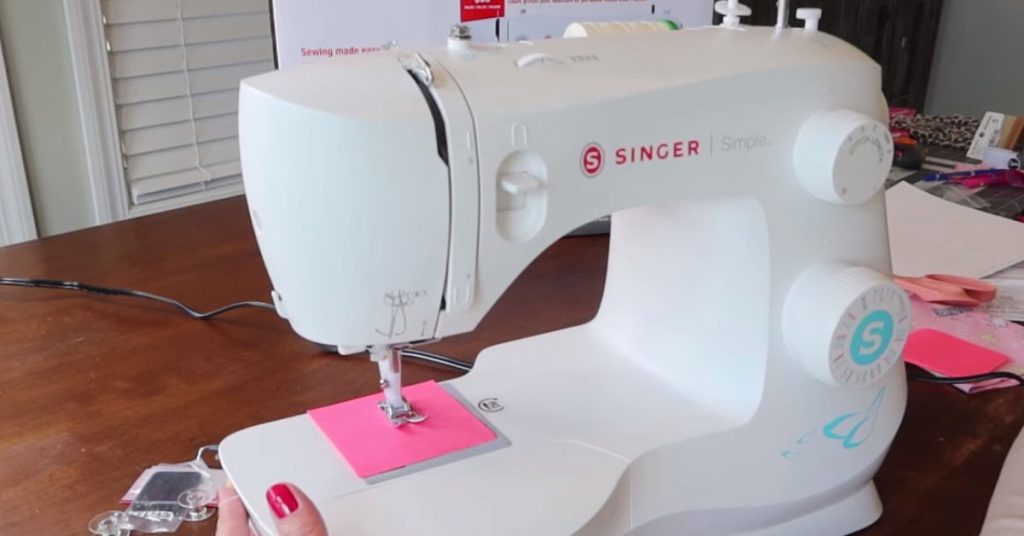
The initial impression of the machine showcases its user-friendly interface, robust construction, and the promise of seamlessly fitting into your sewing journey.
B. Setting Up
Starting on the path to mastering how to use the Singer sewing machine 3337, the setup process becomes a crucial initial step. The Singer 3337 is designed with user convenience in mind, ensuring an uncomplicated setup to get you up and running promptly.
- Machine Placement: Position the Singer 3337 on a stable, level surface, leaving sufficient space around it for easy fabric handling and access to various machine parts.
- Powering On: Locate the power cord and foot pedal inside the box. Connect them to the machine and plug the cord into an electrical outlet. Place the foot pedal conveniently under your worktable where your foot can easily reach it.
- Threading the Machine: Position the thread spool on the spool pin, thread it through the thread guide and tension disc, then loop it through the take-up lever and thread it through the needle eye from front to back. Use the manual thread cutter on the machine’s side for precision.
- Loading the Bobbin: Insert a bobbin filled with thread into the bobbin case under the needle plate, making sure the thread unwinds counterclockwise. Guide the thread through the channel and towards the front of the machine.
- Selecting a Stitch: Use the stitch selector dial to pick your desired stitch type, ensuring the corresponding stitch length and width settings align with your sewing needs.
- Attaching the Presser Foot: Gently raise the presser foot lifter and place your chosen presser foot underneath, ensuring it clicks securely into place.
With these steps, your Singer 3337 is all set and prepared, becoming an extension of your creativity. The machine invites you to explore the countless possibilities it offers as you enter a world where each stitch tells a unique story, whether you’re mending or creating anew. Welcome to a journey where you learn, create, and explore with your Singer 3337, sewing narratives into every creation.
Familiarizing Yourself with the Singer 3337
A. Overview of Key Features
To master how to use the Singer 3337 Sewing Machine, let’s delve into its key features, a blueprint for your sewing endeavors:
- Stitches Galore: The Singer 3337 boasts a rich collection of 29 built-in stitches, including essential, decorative, and stretch stitches. Each stitch type serves a unique purpose, from straight and zigzag to buttonholes and decorative motifs.
- Automatic Needle Threader: No more squinting or straining your eyes. The automatic needle threader simplifies the threading process, ensuring your needle is ready for action in no time.
- Top Drop-In Bobbin: The top-loading bobbin system allows for easy bobbin insertion and monitoring of your thread supply, preventing unexpected run-outs mid-project.
- Adjustable Stitch Length and Width: Precision is at your fingertips. Modify stitch length and width as needed to customize your sewing projects.
- Adjustable Presser Foot Pressure: Whether working with delicate fabrics or heavy-duty materials, the adjustable presser foot pressure ensures even and professional stitching.
- Free Arm: For hemming and sewing cuffs, collars, and other circular items, the machine’s removable accessory tray exposes a free arm, making intricate tasks a breeze.
- Built-In Storage: The machine comes equipped with a storage compartment, offering convenient space to store accessories, thread, and other essentials.

B. Understanding Controls and Settings
Familiarizing yourself with the Singer 3337’s controls and settings is vital for using the machine effectively:
- Stitch Selector Dial: This knob lets you choose from the array of available stitches. Each stitch is typically represented by a number or symbol.
- Stitch Length and Width Dials: Adjust the length and width of the selected stitch using these dials. Different fabrics and sewing techniques may require custom settings.
- Tension Control: The tension dial regulates the tightness of your stitches. Higher tension is suitable for lightweight fabrics, while lower tension is needed for heavy fabrics.
- Reverse Stitch Lever: Reinforce seams and secure the beginning and end of your stitches with the reverse stitch lever. Simply push it while sewing.
- Thread Cutter: Located on the side of the machine, the thread cutter provides a quick and efficient way to trim thread tails.
- Presser Foot Lever: Raise or lower the presser foot with this lever. It’s essential for positioning your fabric and removing it from the machine.
- Bobbin Winding Stopper: When winding a bobbin, engage the bobbin winding stopper to prevent the needle from moving.
By mastering these controls and settings, you gain the ability to tailor your Singer 3337 to the specific demands of your sewing projects. Each component contributes to the machine’s versatility and precision, allowing you to craft and mend with finesse.
Related: How to Use a Singer Sewing Machine
Getting Started with Sewing: How to Use Singer 3337 Sewing Machine
A. Threading the Machine
Threading your Singer 3337 correctly is crucial for achieving smooth and precise stitches. Follow these steps to ensure a hassle-free threading process:
- Raise the Presser Foot: Lift the presser foot lever to release tension on the thread.
- Thread the Upper Thread: Start by placing your thread spool on the spool pin. Follow the thread path as indicated by the guides on your machine, typically moving from the spool pin to the thread guide, through the tension disc, and then down to the take-up lever.
- Thread the Needle: Pass the thread through the last thread guide, and then thread it through the eye of the needle from front to back. Use the automatic needle threader for added convenience, if available.
- Pull Up the Bobbin Thread: Hold onto the end of the upper thread and manually turn the handwheel towards you (always turn it towards you). This action should lower the needle, catch the bobbin thread, and bring it up.
- Secure Both Threads: Gently pull both the upper and bobbin threads to the back of the machine and you’re ready to start sewing.
Tips for Avoiding Common Threading Issues: To prevent common problems like thread breakage or jamming, ensure the presser foot is raised when threading and that the machine is properly threaded. Use good quality thread, and check the thread tension settings to match the fabric you’re working with.
B. Selecting and Changing Needles
Selecting the right needle for your project is essential for achieving the best results with your Singer 3337. Here’s how to do it:
Selecting Needle Sizes: Different fabrics and tasks require different needle sizes. Generally, use finer needles for lightweight fabrics and thicker needles for heavy fabrics. Consult your sewing machine’s manual for specific needle size recommendations.
Changing Needles:
- Turn Off the Machine: Always begin by turning off your machine to avoid accidental injury.
- Raise the Needle: Using the handwheel, ensure the needle is at its highest position.
- Loosen the Needle Clamp: On the side of the needle bar, you’ll find a needle clamp screw. Loosen it by turning it gently in a counterclockwise direction.
- Remove the Old Needle: Carefully slide the old needle down and out of the needle clamp.
- Insert the New Needle: Place the new needle into the needle clamp with the flat side facing the back. Make sure it’s pushed up as high as it can go.
- Tighten the Needle Clamp: Turn the needle clamp screw clockwise to secure the new needle in place.
Note: Always consult your sewing machine manual for specific instructions regarding needle types and replacements. Here attached Singer 3337 manual pdf
C. Choosing and Changing Stitches
The Singer 3337 offers a variety of stitches to accommodate different sewing needs:
Description of Stitch Options: Your machine includes a range of stitches such as straight, zigzag, stretch, and decorative stitches. Consult your machine’s manual for details on the available stitches.
Selecting and Modifying Stitches:
- Turn the Stitch Selector Dial: Rotate the stitch selector dial to the desired stitch number or symbol. Ensure you choose the correct stitch for your project.
- Adjusting Stitch Length and Width: If needed, you can modify the stitch length and width using the corresponding dials to customize the appearance of your stitches.
By following these guidelines for threading, selecting needles, and choosing stitches on your Singer 3337, you’ll be well-prepared to start your sewing projects with confidence and creativity.
Tips and Tricks for Efficient Sewing with Singer 3337
A. Achieving Consistent Stitch Quality
Consistency is the hallmark of a well-crafted project. To achieve consistent stitch quality with your Singer 3337, consider these tips:
- Maintaining Even Stitches: Ensure that the machine is threaded correctly and that the tension is properly adjusted. Test on a fabric scrap before you start your project to make any necessary tension adjustments.
- Tension Adjustment: When working with different fabrics, you may need to adjust the tension to ensure your stitches are balanced. Loosening the tension is usually necessary for lightweight fabrics while tightening it is common for heavier materials.
B. Efficient Fabric Handling
Efficient fabric handling is essential for a smooth sewing experience:
- Handling Different Fabric Types: Understanding how different fabrics behave is key. Use appropriate needles and presser feet for specific fabrics. For delicate fabrics, a walking foot or Teflon foot can help prevent snags.
- Smooth Fabric Feeding: Ensure that the presser foot is lowered and that you guide the fabric gently but firmly as you sew. For challenging fabrics like knits, use a stabilizer to prevent stretching.
- Avoiding Snags: Be mindful of pins, zippers, and other potential snags as you guide the fabric. Remove any obstacles to ensure a seamless sewing process.
C. Troubleshooting Common Issues
Quick solutions for typical sewing machine problems:
- Thread Breakage: Check the thread path for snags, rethread the machine, or adjust the tension as needed.
- Needle Breakage: Ensure you’re using the right needle for your fabric, and replace dull or damaged needles promptly.
- Machine Jam: If the machine jams, turn it off, unplug it, and carefully remove the fabric and any tangled threads before rethreading and restarting.
By mastering these tips and tricks, you’ll enhance your efficiency and the overall quality of your sewing projects.
Maintenance and Care of Singer 3337
A. Regular Maintenance Steps
To keep your Singer 3337 in top condition, follow these maintenance steps:
- Cleaning and Oiling Procedures: Regularly clean out lint and dust from the bobbin area and feed dogs. Consult your manual for specific instructions. Also, remember to lubricate the machine according to the manufacturer’s recommendations.
- Maintaining Smooth Operation: Check and tighten loose screws or parts, replace any worn-out components, and keep the machine covered when not in use to prevent dust accumulation.
B. Handling Minor Repairs
While Singer 3337 is designed for durability, minor issues can still arise:
- Dealing with Minor Issues: If you encounter problems like skipped stitches or unusual noises, consult your manual for troubleshooting tips. Usually, rethreading, adjusting the tension, or replacing the needle can solve these issues.
- When to Seek Professional Help: For major issues, like motor problems or timing adjustments, it’s best to consult a professional technician or your machine’s authorized service center.
Regular maintenance and prompt attention to minor issues will ensure that your Singer 3337 remains a reliable companion in your sewing journey.
Crafting Projects with Singer 3337
A. Beginner-friendly Project Ideas
If you’re new to sewing, start with simple projects like pillow covers, tote bags, or cloth napkins. These projects help you practice basic stitches and gain confidence in your skills. Don’t be afraid to experiment and add personal touches to make them your own.
B. Advanced Projects for Seasoned Sewers
For advanced users, challenge yourself with intricate projects such as tailored garments, quilts, or intricate embroidery. Explore the full potential of your Singer 3337 by experimenting with different stitch combinations and decorative techniques.
Remember, sewing is not just about creating functional items; it’s also about expressing your creativity and personal style.
Conclusion-How to Use Singer 3337 Sewing Machine
As you embark on your sewing journey with the Singer 3337, remember that practice and patience are your best allies. The more you sew, the more you’ll master this versatile machine. We hope this guide on “How to Use Singer 3337 Sewing Machine” has provided you with the knowledge and confidence to create and mend with skill and flair.
Share your sewing stories and projects, and don’t hesitate to seek advice or share your experiences with fellow sewing enthusiasts. The Singer 3337 is not just a machine; it’s a gateway to a world of creativity and craftsmanship.
Farewell, and may your Singer 3337 sew countless memories and masterpieces in the days to come.
You May Also Like
Photo source: amazon.com & youtube.com