In this guide, I will explain how to learn to sew, and how to make the most of your machine, in 5 simple steps!
How many of us have a sewing machine at home? Maybe still in the original packaging, because they don’t know how to use it? Or a gift from your mother or mother-in-law?
Don’t you want to learn how to use it?
Making creative sewing projects, useful for both you and the home?
Well, if you’re starting from scratch these are the first 5 things you need to know to start sewing right away!
Five Step of how to learn to sew:

1. The most important parts of the sewing machine
Knowing your sewing machine is essential.
In reality everything is written in the instruction booklet, but many neglect it, lose it or simply cannot understand the instructions as they are written.
Let’s see together how a sewing machine is made .
There are 8 key parts:
- Spool pin (usually there are 2);
- winder for loading the lower thread spool;
- thread take-up lever ;
- needle block with presser foot and transport claws for the underlying fabric;
- flyer ;
- stitch selection knob ;
- backstitch lever ;
- bobbin case .
To these elements is added the rheostat (or pedal ) which is used to operate the machine and make it sew.
It is advisable to get to know each part of the machine well, in order to always make it work at its best and obtain perfect seams.
Knowing the structure of the machine also allows you to carry out constant maintenance of the machine so that it lasts over time and is always functional.
2. How to thread the sewing machine: lower and upper thread
 How does the sewing machine work? The machine sews by interlacing the upper and lower threads. The upper thread is fed from the spool, while the lower thread is fed from the spool positioned under the metal plate.
The first fundamental thing to learn, therefore, is to thread the thread : both the upper and the lower one.
This is the first activity to learn, the fundamental one.
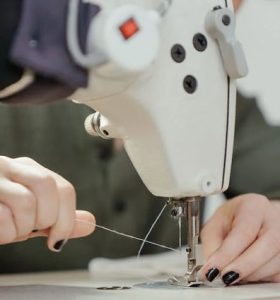
The upper thread starts from the spool and, following the guides drawn on the machine and the thread take-up lever , reaches the needle where it is threaded through the eye .
The lower thread , on the other hand, is wound around the bobbin and encased in the capsule , to be fitted under the stitching area.
You have to practice and learn to thread the thread correctly , otherwise the machine will not sew perfect seams and the thread may break during work.
3. The basic seams of the sewing machine
Anyone who wants to learn to sew is frightened at first because they think it’s complicated and that they’ll never be able to do it.
It is not so!
Starting from a basic machine model, you can learn to sew with little effort and with more than satisfactory results.
 In fact, there are only 3 basic seams that you need to learn:
- the straight stitch ;
- the zigzag stitch :
- the back stitch .
All other stitches are combinations of the straight stitch and zig zag stitch.
Backstitch is used to secure seams at the beginning and end.
All seams need to be backstitched to keep the thread from slipping.
It’s all very simple. You just need to practice and learn the fundamental basics that will allow you to take care of your machine and always sew in an optimal way.
4. Sewing machine accessories and booklet
At the time of purchase, each model of sewing machine comes with an instruction booklet and a series of tools and accessories.
The accessories you find are important.

There are usually:
- the standard presser foot for using the machine;
- the foot for sewing the zipper ;
- the foot for sewing the buttonhole ;
- a buttonhole cutter ;
- the key to disassemble the metal plate of the machine or the presser foot shank;
- the brush for cleaning the machine;
- a replacement of needles and spools.
Then, depending on the model, you may find other additional accessories, such as different types of feet or the darning plate.
5. Pot holders: exercise on basic seams
Once you have learned the concepts we have seen in the 4 previous steps, you can start practicing with some video tutorials on this blog.
A very simple project that I recommend to those starting from scratch is that of pot holders for the kitchen.
You will just have to practice and get familiar with your machine and this can be a good place to start.
The more you use the sewing machine, the more you will learn to understand how it works and you will also be able to solve by yourself those small inconveniences that can be encountered during a seam.
“The ABC of creative sewing”

So, are you ready to get started?
Or would you like some more in-depth explanation?
To help those who, like you, want to start sewing from scratch, I have created 5 free video lessons called “The ABCs of creative sewing”.
In each video lesson we will see each of the topics you need to get started:
- the basic parts of the sewing machine;
- how to thread the upper and lower thread correctly ;
- learn to make the straight stitch, zig zag and back ;
- the importance of accessories;
- we will make a pot holder for the kitchen from scratch !
Recommended reading:
Photo: pexels.com and amazon.com