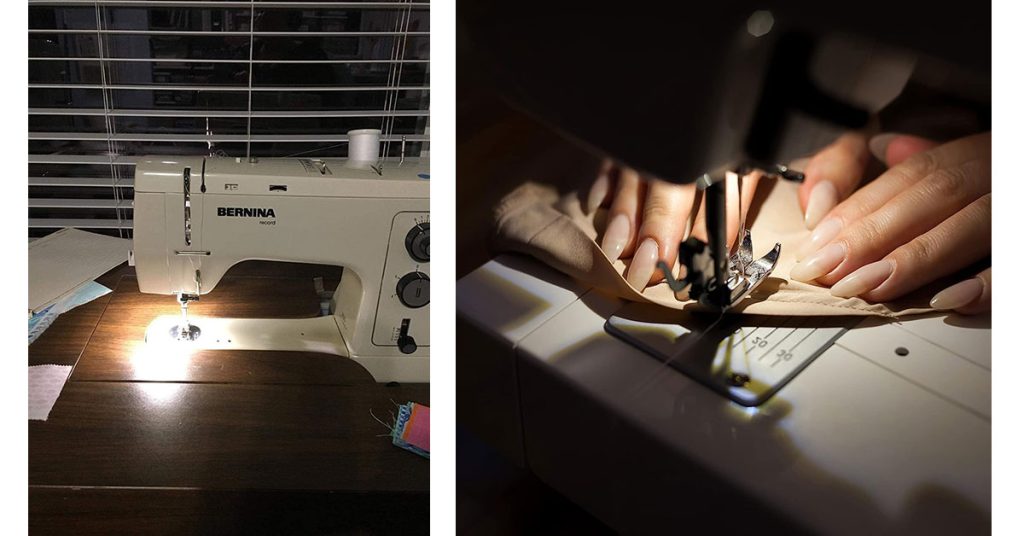
When it comes to the world of sewing, the importance of good lighting cannot be overstated. Whether you’re a seasoned seamstress or just starting your sewing journey, proper illumination is key to precision, accuracy, and sewing with ease. That’s where your Janome sewing machine’s light bulb comes into play.
But what do you do when that trusty bulb starts to flicker or dim, casting shadows over your creative projects? Fear not! In this comprehensive guide, we will walk you through the essential steps on how to change the light bulb in your Janome sewing machine.
From identifying the right replacement bulb to mastering the art of safely removing the old one and installing a new one, we’ve got you covered. We’ll even delve into troubleshooting tips and strategies to prolong the life of your new light bulb.
So, whether you’re crafting intricate designs, stitching beautiful garments, or quilting stunning patterns, you can count on us to shed light on the process. By the end of this guide, you’ll not only have a brilliantly lit workspace but also the confidence to tackle any sewing project with precision.
Join us as we embark on this enlightening journey to ensure your Janome sewing machine is equipped with the perfect lighting companion. Let’s get started on a brighter and more productive sewing experience!
Step-by-Step Guide: Changing the Light Bulb in a Janome Sewing Machine
1. What You Will Need
Changing the light bulb on your Janome sewing machine is super easy. But before you start, you’ve got to make sure you have the right tools and supplies. Without the right stuff, the job can get complicated or even unsafe. Here’s what you’ll need:
- A New Light Bulb Compatible With Janome Sewing Machines
First things first, you’ve got to get a new light bulb. But you can’t use just any light bulb; it has to be one that fits your Janome sewing machine. The best place to find out what kind of bulb you need is in your sewing machine’s manual. If you can’t find it, you can also look online or call up a store that sells Janome sewing machines. They should be able to help you out.

- A Screwdriver
Next, you’ll need a screwdriver. This is what you’ll use to open up the area where the light bulb goes. Most of the time, a Philips head screwdriver will do the trick. But check your sewing machine to be sure. If you’re not sure what a Philips head screwdriver is, it’s the one that looks like a plus sign at the tip.

- Gloves
Last but not least, you’ll need a pair of gloves. Why gloves? Well, they help in a couple of ways. First, they keep your hands clean. Sewing machines can get greasy, and you don’t want to get that on your hands. Second, gloves are good for safety. If the old bulb breaks when you’re taking it out, gloves will protect your hands from getting cut.
Alright, that’s all you need! A new light bulb, a screwdriver, and some gloves, and you’re good to go. Stay tuned for the step-by-step guide on how to change that light bulb on your Janome sewing machine.
2. Safety First
Changing a light bulb in your Janome sewing machine is a piece of cake, but let’s not forget about safety. Here’s how to keep safe:
- Unplug the Janome Sewing Machine


The first step is to unplug your sewing machine. You don’t want it to be on while you’re changing the bulb. That could be dangerous. So, pull the plug out of the wall before you start.
- Let the Old Bulb Cool Down
If you’ve been using your sewing machine, the light bulb might be hot. You don’t want to burn your fingers. So, give it some time to cool down. Maybe go grab a cup of coffee and then come back.
- Put on Gloves for Safety
Wear gloves while changing the light bulb. This will keep your hands clean and protect you from any broken glass, just in case the old bulb breaks.
3. Identifying the Right Bulb
Not every light bulb will fit your Janome sewing machine. So you’ve got to find the right one.
- Check Your User Manual
Your sewing machine’s manual will tell you what kind of light bulb you need. Look for the section about maintenance or light bulb replacement.
- Visit the Janome Website
If you can’t find your manual, the Janome website is a good place to look. They’ve got information on what bulb fits which machine. You can find it in the FAQs or product details.
4. Getting Ready
You’ve got your tools, and you know how to stay safe. Now, let’s get that light bulb changed.
- Remove the Cover
The first thing to do is to take off the cover that’s hiding the light bulb. This is where your screwdriver comes in handy. Find the screws that hold the cover, and carefully unscrew them.

- Make Sure Nothing’s in the Way
Before you get started, make sure nothing will get in your way. Move any fabric or thread that’s near the light bulb area. You want a clear space so you can easily change the light bulb on your Janome sewing machine.
Alright, you’re all set to change that light bulb and get back to sewing. Stay tuned for a step-by-step guide on actually replacing the bulb!
5. Changing the Light Bulb: Step-by-Step
Alright, you’ve got everything you need, and you’ve made sure it’s safe to go ahead. Now let’s get that light bulb changed in your Janome sewing machine.
a. Removing the Old Bulb
The first step is taking out the old light bulb. Here’s how:
- Put on your gloves. This keeps your hands clean and safe.
- Hold onto the base of the old bulb. That’s the bottom part that screws into the machine.
- Gently turn it to the left, like you’re opening a jar. Keep turning until it comes out.
- Be super careful. If the bulb breaks, it could hurt your hand. That’s another reason why you’re wearing gloves.
Here’s an expanded and detailed description of the first step, “Removing the Old Bulb,” focusing on the nitty-gritty of each action and explaining the reasons behind them.

The very first thing you’ll need to do is remove the old light bulb from your Janome sewing machine. Let’s dive into the specifics of how to do this safely and effectively.
a-1. Put on Your Gloves
Before you even touch the old bulb, put on a pair of gloves. Why is this important?
- Safety: The old light bulb could be hot if you’ve been using your machine. Even if it’s cool, it could break, and you definitely don’t want to get cut.
- Cleanliness: The gloves will prevent any oil or dirt from your hands from getting on the bulb, which could affect its performance or longevity.
a-2. Hold Onto the Base of the Old Bulb
Now that you’re wearing gloves, reach for the base of the old light bulb. The base is the bottom part that’s screwed into the machine, not the glass part. This is important because holding it by the base will give you a better grip and it’s less likely to break.
a-3. Gently Turn it to the Left
To unscrew the old bulb, you’ll need to turn it counterclockwise or to the left as if you’re opening a jar. Use a gentle, steady motion; don’t jerk it around. If it’s stuck, don’t force it. Take a deep breath, make sure you have a firm grip, and try again.
a-4. Be Super Careful
You have to be extra cautious during this step for a couple of reasons:
- Breakage: Light bulbs are delicate, and the old one could break if you’re not careful. That’s one of the reasons you’re wearing gloves. If it breaks, the gloves can protect your hands from the broken glass.
- No Quick Movements: Take your time. Quick movements can lead to mistakes or accidents. Slow and steady is the way to go when you’re unscrewing the old bulb.
By following these detailed steps, you’ll be able to successfully and safely remove the old light bulb from your Janome sewing machine, setting the stage for installing a new one.
b. Putting in the New Bulb
Got the old bulb out? Great! Now let’s put in the new one:
- Still, wearing those gloves? Good. Grab the new bulb by its base.
- Slide it into the socket. That’s the hole where the old bulb was.
- Turn the new bulb to the right, or clockwise. Keep turning until it won’t go anymore. But don’t force it. If you turn too hard, you might break it.
- Once it’s in there good and snug, you’re done with this part.
Let’s go into more depth on the second crucial step, “Putting in the New Bulb.” I’ll break down each action into easy-to-follow steps and explain why each is important.
Congratulations on safely removing the old bulb from your Janome sewing machine! Now, let’s focus on installing the new one. Here’s how you can do it smoothly and safely.
b-1. Still, Wearing Those Gloves? Good.
You should continue to wear gloves throughout this process, and here’s why:
- Safety: Even a brand-new bulb can be fragile, and wearing gloves can protect you in case it breaks.
- Cleanliness: Gloves prevent the oils from your hands from getting on the new bulb. These oils could create hot spots on the bulb, which could shorten its lifespan.
b-2. Grab the New Bulb by its Base
With gloves still on, hold the new light bulb by its base, not the glass part. This gives you a better grip and minimizes the risk of the bulb breaking. Remember, the base is the metal part at the bottom, while the glass is the round part that emits light.
b-3. Slide it into the Socket
Now, carefully align the base of the new bulb with the socket in the sewing machine—that’s the hole where the old bulb was. Make sure it’s aligned correctly; otherwise, it won’t screw in properly.

b-4. Turn the New Bulb to the Right, or Clockwise
Start turning the bulb clockwise, or to the right. Use gentle, steady turns. Keep turning until you feel resistance, but don’t force it beyond that point for two reasons:
- You Could Break It: Light bulbs are sensitive. If you turn too hard, you could break the bulb or damage the socket.
- Stripping the Threads: If you force it, you could strip the threads on the base of the bulb or the socket, making it hard to remove the bulb in the future.
Once It’s in There Good and Snug, You’re Done with This Part
Once you’ve turned the bulb until it’s snug, but not forced, you should be good to go. It should be held firmly in place but not over-tightened.
6. Testing It Out
You’ve got the new light bulb in, but we’re not done yet. Let’s make sure it actually works:
- First, plug your Janome sewing machine back into the wall.
- Hit the power button to turn the machine on.
- Look at the light. Is it shining bright? If yes, you did it!
- If the light’s not on, don’t worry. Unplug the machine and check if the bulb is screwed in all the way. Then try again.
Now, let’s delve into the details of the final step, “Testing It Out.” This part is crucial because it confirms that you’ve successfully changed the light bulb in your Janome sewing machine. Here’s a detailed breakdown:
Installing a new bulb is a milestone, but it’s important to make sure it actually works before declaring victory. Here’s how to confirm that your new bulb is shining bright and ready to light up your next sewing project.
First, Plug Your Janome Sewing Machine Back into the Wall
You unplugged the sewing machine for safety when you started this process. Now, it’s time to plug it back in. Make sure you insert the plug securely into the wall outlet, ensuring a good connection. This is the first step in testing your new light bulb.
Hit the Power Button to Turn the Machine On
Locate the power button on your Janome sewing machine. It’s usually pretty easy to find. Press it to turn the machine on. This is the moment of truth! Your machine should power up, and with it, your newly installed light bulb should illuminate.
Look at the Light: Is It Shining Bright?
Now, focus your attention on the light bulb. Does it light up? Is it shining bright? If the answer is yes, then congratulations, you’ve successfully changed your light bulb!
If the Light’s Not On, Don’t Worry
Sometimes things don’t go as planned. If the light bulb isn’t shining, it’s okay. Here are some steps to troubleshoot:
- Unplug Again: For safety, unplug your Janome sewing machine from the wall.
- Check the Bulb: Open up the cover and make sure the bulb is screwed in all the way. Sometimes it might seem like it’s in, but it could use another half-turn.
- Re-test: Plug the sewing machine back in, turn it on, and check the light again. If it’s still not working, you may want to consult your manual or get professional help.
And There You Have It!
You’ve walked through each step carefully, from removing the old bulb to testing the new one. If your new light bulb is shining bright, you’ve completed the task. Now, you can get back to your sewing projects with perfect lighting conditions!
Troubleshooting
If the new bulb doesn’t turn on, check these things:
- Is it screwed in all the way?
- Is the bulb the right type for your Janome sewing machine?
- Is the socket damaged?
Tips for a Long-Lasting Light Bulb
Want to make that new bulb last as long as possible in your Janome sewing machine? Here are some tips:
- Consider using an LED bulb. They last longer and use less energy.
- Don’t touch the bulb with your bare hands. Oils from your skin can make it wear out faster.
Conclusion of the How to Change Light Bulb in Janome Sewing Machine
Good lighting is the unsung hero of every sewing project. It’s the difference between straining your eyes and effortlessly bringing your creative visions to life. Your Janome sewing machine’s light bulb plays a pivotal role in ensuring your sewing workspace is well-illuminated and free from shadows.
Changing the light bulb in your Janome sewing machine may seem like a small task, but its impact on your sewing experience is anything but insignificant. With the knowledge and guidance provided in this comprehensive guide, you’ve acquired the skills to make this task easy, safe, and highly effective.
The Importance of Good Lighting
Throughout your sewing journey, you’ve likely encountered moments when clear, bright lighting made all the difference. Whether you’re meticulously stitching intricate patterns, sewing delicate fabrics, or quilting intricate designs, good lighting is your trusty companion. It minimizes eye strain, enhances precision, and ensures you can focus on your craft without hindrance.
Your Newfound Expertise
By following the step-by-step instructions outlined in this guide, you’ve achieved several key milestones:
- You’ve learned how to identify the right replacement bulb, ensuring compatibility with your Janome sewing machine.
- You’ve mastered the art of safely removing the old bulb and confidently installing a new one.
- You’re well-prepared to troubleshoot in case the new light doesn’t immediately shine bright.
- You’ve gained valuable tips for prolonging the life of your new light bulb, helping you save both time and money.
Illuminate Your Sewing Journey
Your sewing projects have now entered a new era of brilliance. With a fresh, shining light bulb in your Janome sewing machine, you can take on any project with clarity and confidence. The possibilities are endless, from intricate embroidery to stylish garment creation, and everything in between.
Frequently Asked Questions
- How often should I change the bulb?
It depends on how much you use your Janome sewing machine. Change it when it starts getting dim.
- Can I use any bulb?
No, make sure it’s a bulb that fits your Janome sewing machine model.